The water you can see on your floor is rarely the whole story. Moisture routinely travels behind drywall, under flooring, inside cabinetry, through insulation, above ceilings, and beneath slab foundations long before any visible sign appears. Gateway Restoration uses thermal imaging cameras and calibrated moisture meters to locate that hidden water and build a documented moisture map of your Chandler property, so nothing gets missed and nothing gets over-demolished.
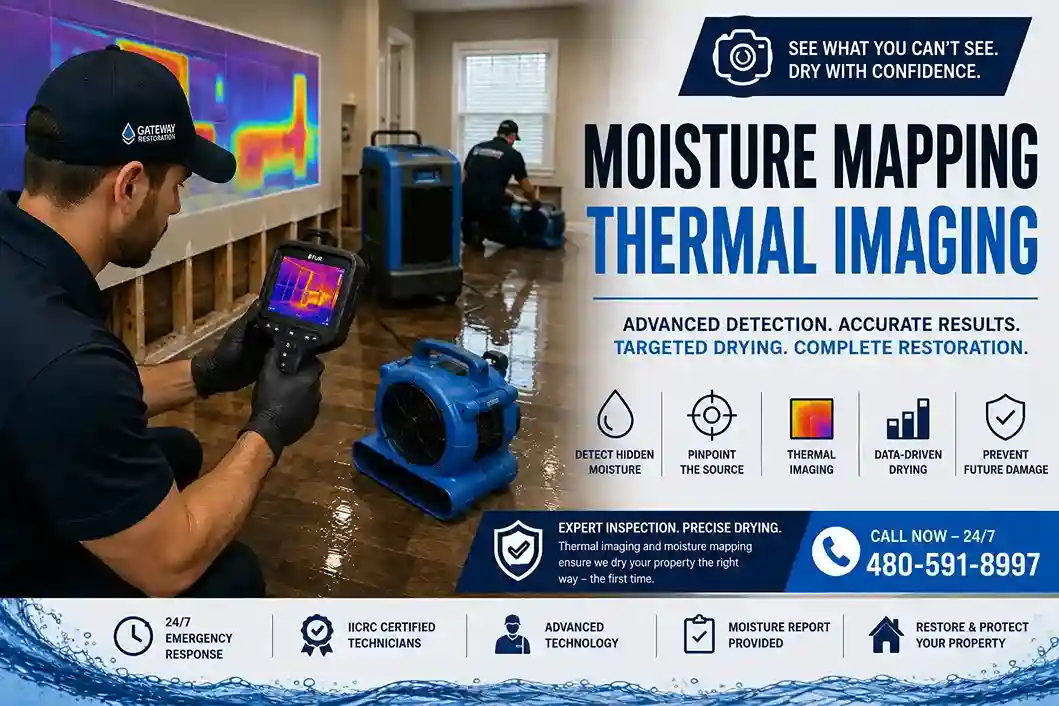
Moisture mapping is the systematic process of detecting, measuring, documenting, and tracking water intrusion throughout a structure. Rather than relying on a single visual inspection, technicians use moisture meters, hygrometers, thermal imaging cameras, and digital reporting tools to build a complete, data-driven picture of where a building is wet, where it's dry, and how moisture is behaving over time.
The output of this process is a moisture map: a room-by-room record showing wet areas, dry reference points, migration patterns, and drying progress. Think of it as a blueprint of water movement through your home or building. Instead of guessing where to place drying equipment or how far to cut back drywall, restoration technicians use the moisture map to target their work precisely, which shortens drying time and reduces unnecessary demolition.
This inspection and diagnostic process is distinct from extraction or drying itself. Moisture mapping answers the question "where is the water and how much is there," which is the foundation every other restoration decision is built on.
A wet spot on the ceiling or a damp patch of carpet is often only a fraction of the actual affected area. Water moves along the path of least resistance, wicking sideways under flooring, climbing inside wall cavities, saturating subfloor and insulation, and pooling behind cabinetry where it's completely out of sight. Left undiscovered, that trapped moisture becomes the ideal environment for mold growth, wood rot, and structural deterioration, often for weeks before a homeowner notices a smell or a stain.
Thermal imaging uses an infrared camera to read surface temperature differences across walls, ceilings, and floors. As water evaporates from a wet building material, it cools the surrounding surface slightly, and that subtle temperature shift shows up as a distinct pattern on the thermal camera's display.
It's important to understand what thermal imaging actually does: the camera does not "see" water. It sees heat. A cool patch on a thermal scan is a strong indicator of possible moisture, but it can also result from insulation gaps, air leaks, or shaded exterior walls. That's exactly why thermal imaging is paired with direct moisture meter testing on every inspection, so a temperature anomaly is confirmed as actual moisture before any conclusions are drawn or drying decisions are made.
In practice, this means our technicians can scan an entire room, wall, or ceiling in minutes, identifying every area worth investigating instead of testing a wall inch by inch with no starting point.
These two tools serve different, complementary purposes, and a thorough inspection uses both. Thermal imaging tells us where to look. Moisture meters tell us what's actually there.
| Thermal Imaging | Moisture Meter Testing |
|---|---|
| Fast, non-invasive scanning of large surface areas | Direct, precise moisture percentage readings |
| Identifies temperature anomalies suggesting moisture | Confirms whether moisture is actually present |
| Covers full walls and ceilings in minutes | Verifies specific spots flagged by the thermal scan |
| Screening tool — narrows down where to test | Verification and documentation tool for insurance |
Restoration professionals consistently treat thermal imaging as the first pass and moisture meters as the confirmation step. Used alone, thermal imaging can produce false positives from insulation gaps or airflow; used alone, moisture meters require testing point by point with no way to prioritize where to start. Together, they produce accurate, defensible readings that hold up for both drying decisions and insurance claims.
Water escaping a pressurized supply line beneath the slab travels laterally under flooring, often surfacing far from the actual leak point.
Water entering through damaged roofing or flashing can track along rafters and framing for feet before it ever stains a ceiling.
Wind-driven monsoon rain forces water past window seals, door thresholds, and stucco penetrations during Arizona's summer storm season.
A clogged or disconnected condensate line lets air conditioning condensation soak attic insulation and ceiling drywall, often in bedrooms.
Slow leaks from dishwashers, refrigerator lines, and washing machines commonly saturate flooring and cabinetry unnoticed until damage is advanced.
Drip lines and sprinkler leaks near the foundation can drive moisture into slab edges and exterior wall cavities over time.
Cracked stucco and failed window flashing let water behind the exterior finish, where it can travel unseen inside wall cavities.
Expansive clay and caliche soil can direct water toward the slab edge, introducing moisture at the base of exterior and interior walls.
Chandler's soil, climate, and construction methods create detection challenges that don't exist in every market, which is exactly why generic inspection approaches fall short here.
Most Chandler homes sit directly on a concrete slab, so plumbing leaks travel beneath flooring instead of draining into a basement or crawlspace.
Dense caliche layers resist drainage, while expansive clay shifts as it absorbs moisture, both of which push water toward the slab and foundation.
Fast, wind-driven summer storms push water into gaps that stay dry the rest of the year, making intrusion points harder to anticipate.
Stucco can trap moisture behind its surface for weeks, hiding wall cavity water from view until interior signs appear.
Near-constant air conditioning use raises the odds of condensate line failures in attics above living spaces.
Kitchen and bathroom cabinetry conceals slow appliance and supply-line leaks that go undetected without targeted scanning.
We walk the property, review the water event or concern, and identify the areas most likely to be affected.
Infrared cameras scan walls, ceilings, and floors to flag temperature anomalies worth investigating further.
Every flagged area is tested directly with calibrated moisture meters to confirm actual moisture content.
Hygrometers record relative humidity and dew point, since ambient conditions affect drying and mold risk.
Readings are logged into a digital map showing wet zones, dry reference points, and affected materials.
We trace how far moisture has traveled from its source, which is often much farther than the visible damage.
Findings determine equipment placement, drying goals, and which materials need to be removed versus dried.
A complete report with readings, images, and findings is compiled to support your insurance claim.
Moisture mapping isn't a standalone service that ends once the report is printed. It's the diagnostic layer that guides every decision in the restoration process that follows. Extraction crews use it to confirm they've addressed all standing water. Mitigation and drying teams use it to place air movers and dehumidifiers exactly where they're needed instead of blanketing an entire room. Demolition decisions, including how far back to cut drywall or whether flooring can be saved, are based on documented moisture readings rather than assumption.
Throughout structural drying, we return to take follow-up readings, comparing them against the original moisture map to track progress objectively. This is how we know when a structure has genuinely reached dry standard, rather than just looking dry on the surface. If your loss also involves standing water or active drying, our water extraction, structural drying, water mitigation, and dehumidification services pages cover those next steps in detail.
Mold doesn't need a flood to take hold. It needs a warm, damp material and time, and in Arizona's indoor environments, that combination can develop within 24 to 48 hours. Small, hidden moisture pockets behind a cabinet, inside a wall cavity, or under a small section of flooring can quietly create ideal mold-growing conditions long before any visible sign, odor, or health symptom appears.
This is one of the most consistent findings restoration professionals report: by the time mold becomes visible or noticeable by smell, the hidden moisture that caused it has often been present for weeks. Moisture mapping catches that window early. Identifying and drying a small wet area today is dramatically less disruptive and less expensive than remediating a mold colony that's had time to spread through wall cavities and insulation. If mold has already developed, our mold remediation services address it directly.
Every moisture mapping inspection we perform generates a paper trail built specifically for insurance review: dated moisture logs showing readings by room and material, thermal images capturing the original scan findings, drying records tracking progress over time, and a written inspection report summarizing the scope of the loss.
This documentation matters because adjusters need objective evidence, not a homeowner's or contractor's word, to approve the scope of a claim. A clear moisture map showing exactly how far water traveled, and later readings proving the structure reached dry standard, gives your claim the support it needs to move faster and with fewer disputes. Learn more about how we work with carriers on our insurance documentation page.
We perform moisture mapping and thermal imaging inspections across every type of Chandler residence.
Commercial properties need fast, well-documented inspections to limit downtime and support claims.
Gateway Restoration provides moisture mapping and thermal imaging inspections throughout Chandler and the surrounding East Valley.
Moisture mapping is the process of detecting, measuring, and documenting water intrusion throughout a structure using moisture meters, thermal imaging cameras, and hygrometers. Technicians create a visual map showing wet areas, dry areas, and drying progress so restoration teams can target their work with precision instead of guessing.
Not exactly. Thermal cameras detect temperature differences on a surface, not water itself. Evaporating moisture cools building materials, creating a temperature pattern that suggests possible moisture behind the wall. A moisture meter is then used to confirm whether actual water is present.
Thermal imaging is highly accurate for identifying temperature anomalies across large areas quickly, but it is a screening tool, not a direct moisture measurement. Accuracy for confirming actual moisture content depends on pairing thermal scans with calibrated moisture meter readings.
Yes. Slab leaks often send water laterally under flooring and up into walls far beyond the visible wet spot. Moisture mapping documents the true extent of migration so drying equipment is placed correctly and no hidden pockets are missed.
Yes. Mold can begin developing in warm, damp conditions within 24 to 48 hours, and hidden moisture inside walls, insulation, or subfloor is a leading cause of mold that appears without an obvious water event. Early detection through moisture mapping helps prevent this.
In most cases, moisture mapping and thermal imaging are included as part of a covered water damage claim because they document the extent of loss and confirm when a structure is fully dry. We provide the reports and readings adjusters expect to see.
A typical residential moisture mapping inspection takes 45 minutes to 2 hours depending on the size of the property and the number of areas being scanned. Larger commercial properties or complex water events may take longer.
We use infrared thermal imaging cameras, penetrating and non-penetrating moisture meters, hygrometers for relative humidity, and digital reporting software to build a documented moisture map of the property.
Yes. Water extraction removes standing water from surfaces, but moisture often remains trapped inside drywall, subfloor, insulation, and framing. Moisture mapping identifies exactly where that trapped moisture is so structural drying can target it.
During active structural drying, moisture readings are typically taken once daily to track progress and confirm materials are returning to normal moisture levels before drying equipment is removed.
Early detection is the difference between drying a small wet area in a day and remediating a mold problem that took weeks to develop unseen. Moisture mapping and thermal imaging catch what's invisible now, lower your repair costs, and give your insurance claim the documentation it needs to move faster.
Serving Chandler, Gilbert, Mesa, Tempe, Queen Creek, and Phoenix, AZ.